To visualize any data, SportWatcher must read some informations from a GPS receiver. To do this, SportWatcher offers a menu point:
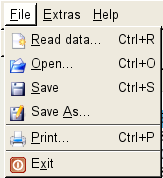
With the menu point Read Data, it reads out the wanted informations. After clicking on this menu point, a window appears, showing the progress of the read process.
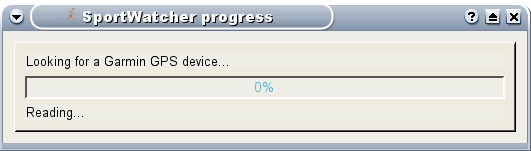
Depending on the set of data in the watch, this may take up to several minutes. As soon as everything was read successful, the progress dialog disappears, and one or more new entries appear at the left of the program window. Everything is saved in files on your disk at this time.
SportWatcher reads allways everything out of the GPS receiver, but it stores only events who are not allready exists on disk. So, existing files are not overwritten.
You must not setup SportWatcher to make use of it. After successful installation, it should work out of the box. But as allways, there are some settings available.
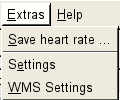
The menu point Settings under the menu Extras, allows to set the basics for SportWatcher. in the following, you will find a detailed description, for everything in this dialog.
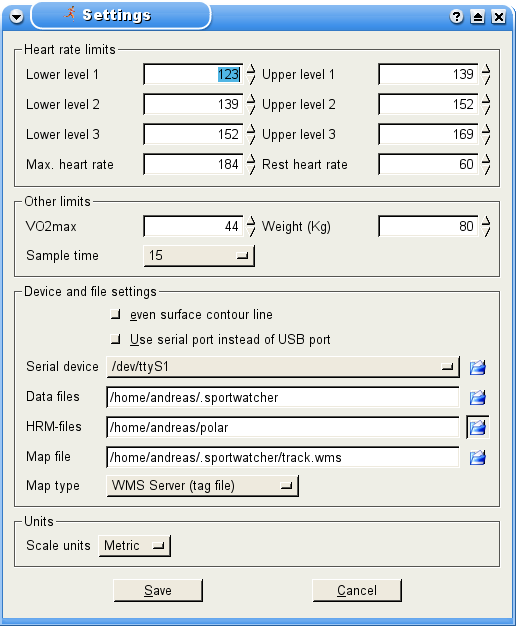
This part of the dialog box contains the ability to set your personal heart rate limits. To find this limits out, you can make an expensive lactat test, where you have to make more than one to get reasonable limits. If you want to do this, ask your local doctor.
A simple method to find out the limits is the following formula:
<Max. HF> = 220 − <age>
Now calculate the limits from the maximum heart frequency (x% if HF):
| Zone | Intensity | Run | Bike |
|---|---|---|---|
| 0 (< 1) | very low | < 65% (regenerative run) | < 52% (CZ −> Compensation Zone) |
| 1 | low | 65% − 80% (Ext ER −> Extensive endurance run) | 52% − 65% (BA1 −> basic 1) |
| 2 | middle | 80% − 85% (Int ER −> Intensive endurance run) | 65% − 77% (BA2 −> basic 2) |
| 3 | high | 85% − 90% (SR −> speed run) | 77% − 90% (PE −> power endurace) |
| 4 (> 3) | very high | >90% (SR −> speed run (match)) | > 90% (HP −> high power) |
The VO2max gives the maximum oxygen saturation in percent. This indicator
is also found during a lactat test. Unfortunately there is no simple formula to
calculate this, as far as I know.
The second value weight is the the weight of your body in kilogramm.
This block defines, where SportWatcher saves it files and looks for informations.
Sometimes the meassured height is not very pecise, specifically the Forerunner 305 has a problem with it. So, if you get a jumpy surface line, you can even this line somewhat by setting this option.
In case your GPS receiver uses a serial port instead of the USB port, you can set this option. As a consequence you must set the name of the serial port as described at 4.1.3.3.
Hinweis: This function is not tested by now and it is very likely, that it will not work
This contains the name of the serial device. You need this, in case your GPS receiver is connected over the serial port. This value is only used, if the option Use serial port instead of USB port is set (look at 4.1.3.2).
This is the drectory, where SportWatcher stores it files. By default, this is .sportwatcher in your home directory. This directory will be created, after the first start of SportWatcher, in case it does not exist.
If you use a Polar watch to meassure the heart rate, the software of Polar (if you have a watch that allows to transmit the data to your computer) stores all files into a particular directory. Here you can set this directory, and if you save the heart rate of a session as a HRM file, SportWatcher suggests you to save the file in this directory. Of course you can save the file still elsewhere, if you like.
This value contains the name of a map file or a file name, containing
controls to get a map from somewhere. If you like SportWatcher to
display a map underneath the track, you must set this conscientiously.
This line works together with the Map type (look at 4.1.3.7).
While the map type defines the kind of map, this line defines the
file necessary to find the map.
There are two basic kinds of map types. A raster image is a simple
file containing a picture of a map and can be one of several formats.
Drawback is, that such files doesn't contain geo informations. So you
have to set the dimensions yourself. Only the format "TIFF" may
contain geo coordinates, but this is optional and not commonly used.
Another drawback of raster images is their fixed size and resolution. They
show only a distinct area. If your track is inside this area, you'll get
a map, otherwise you'll get a black background.
Fortunately there exist some vector base formats, who overcome all this
drawbacks. The simplest way (and currently only supported "vector"
format) is a WMS server. All you have to do, is giving a name for
the control file, where SportWatcher stores the request to the
WMS server. Make sure, the file name ends in .wms! Now you must
define the values for the request to the WMS server under the menu point
WMS settings.
Here you can set the type of the map, you want to use. SportWatcher uses the GDAL library to access maps (look at 4.1.3.6). "GDAL" supports more formats, as SportWatcher allows to use. This is, because every format needs some efford to implement. Therefore I've implemented only the must used formats.
With this switch, you can choose between metric and us statute meassurement. The metric meassurement is the default.
 |
3.3 Settings for Linux |  |
|
4.2 WMS Settings | |
© 2006 − 2011 by Andreas Theofilu (theosys)

